How ECU BIN analysis works in ECUSBF – step-by-step guide
This page walks through the actual ECUSBF workflow: selecting three ECU BIN files, reviewing the MT table and charts, editing selected curve points and finally confirming the experimental output file.
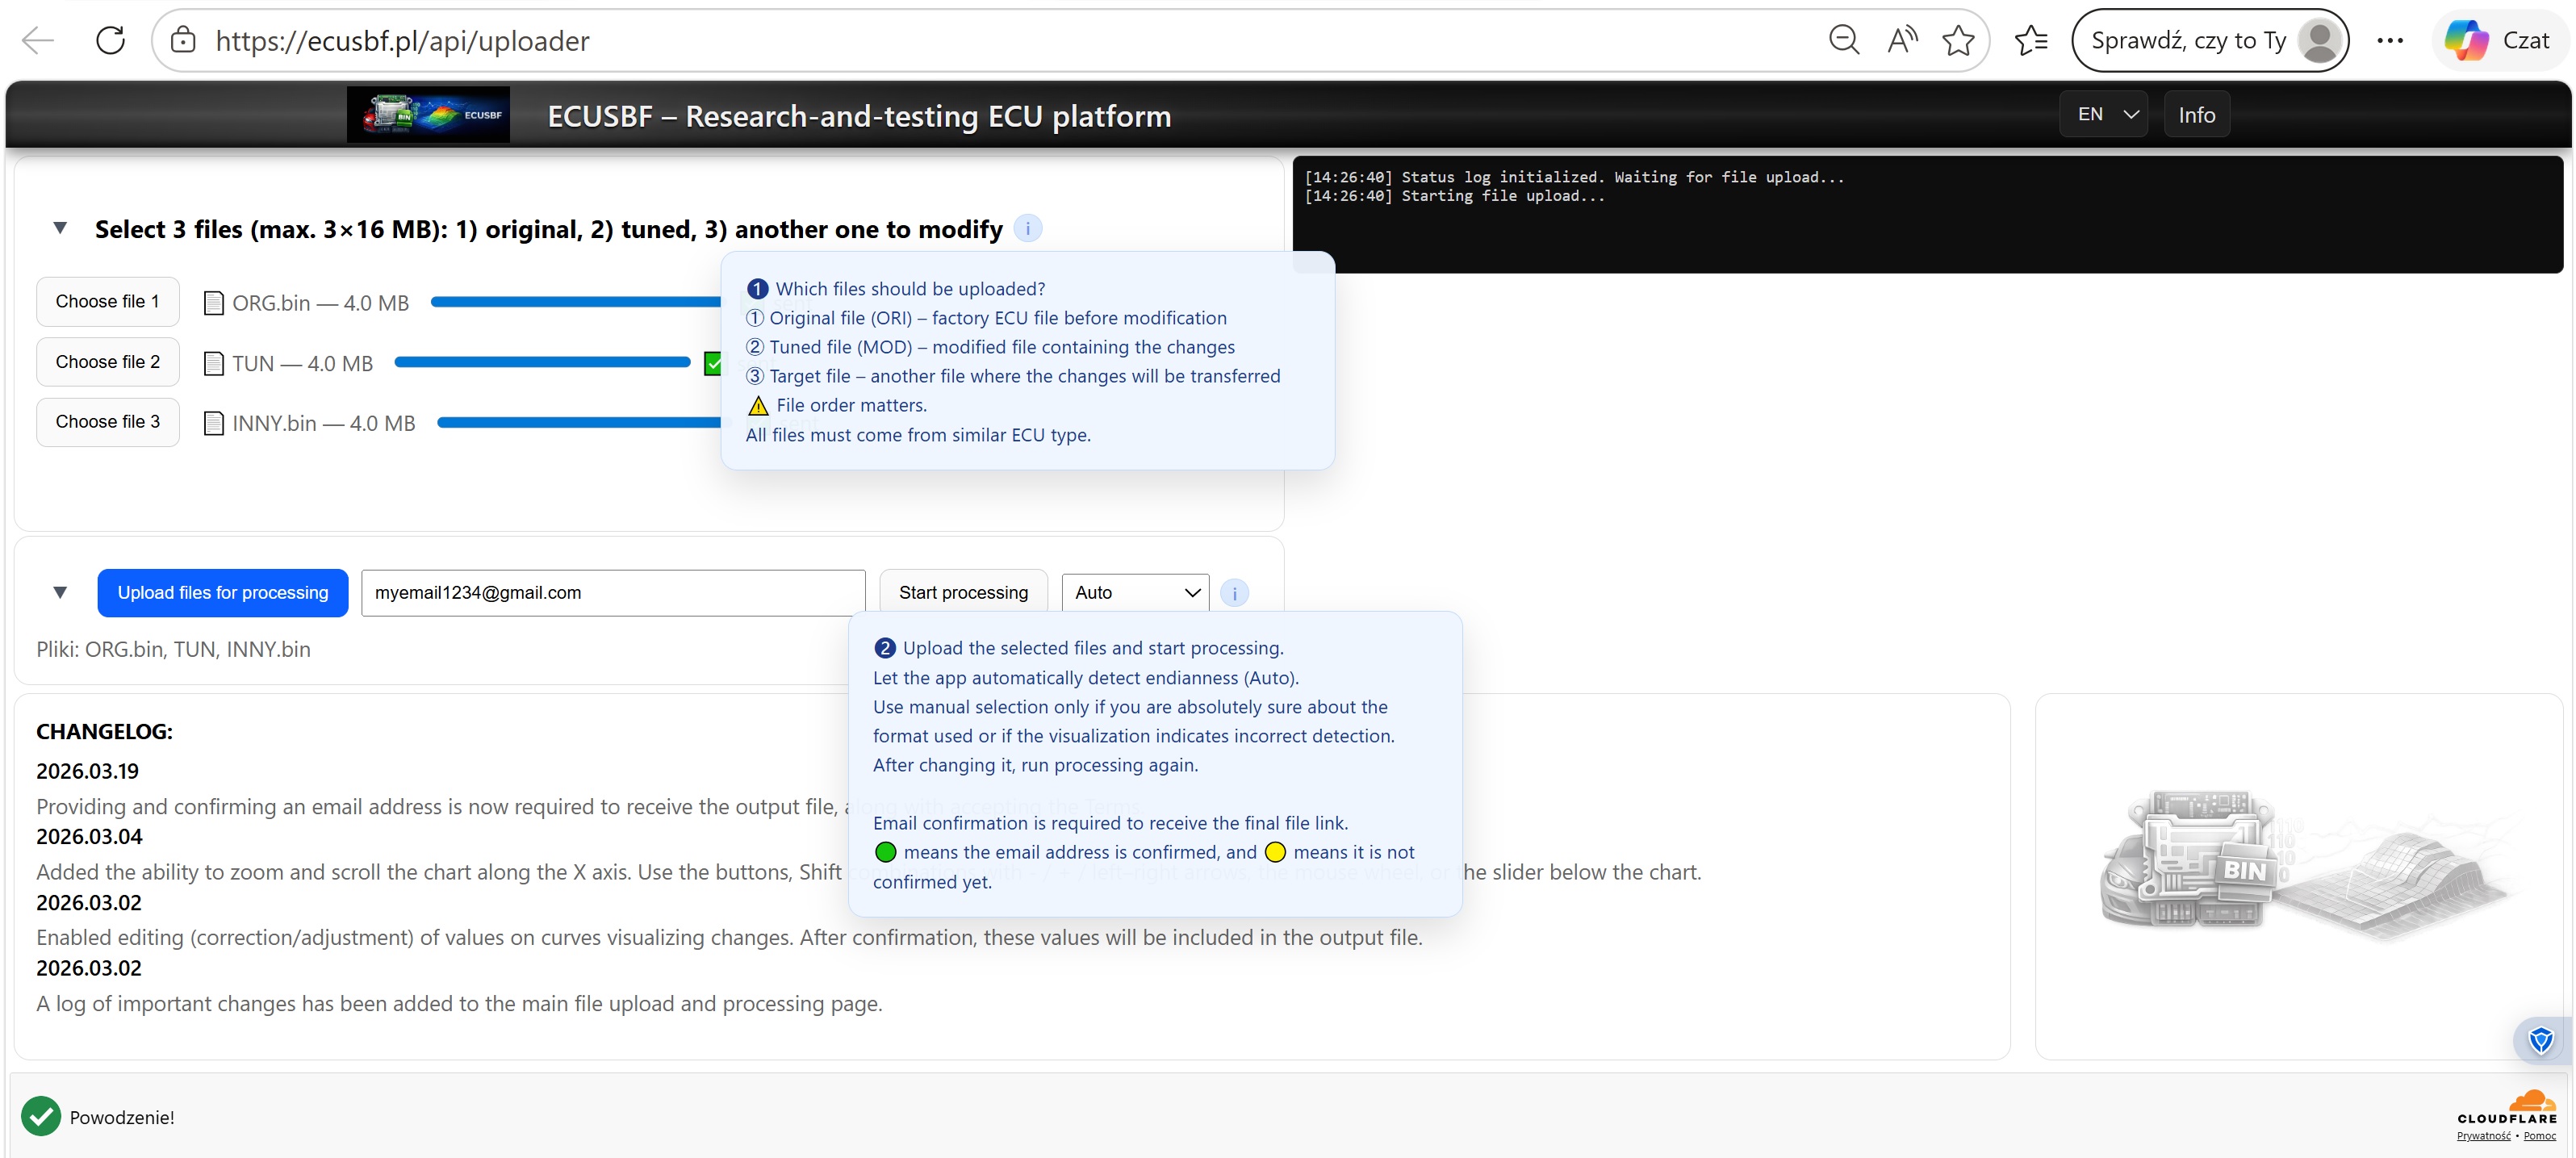
1–2Selecting files and starting processing
The workflow starts with three files: the original file, the modified file and the target file where matched change records may later be applied. File order matters, and all three files should come from a similar ECU family or controller type.
After selecting the set, you provide an email address, upload the files and start processing. The default Auto mode lets the application detect the likely endianness. Manual selection should only be used when you are confident about the format or when the result suggests incorrect detection.
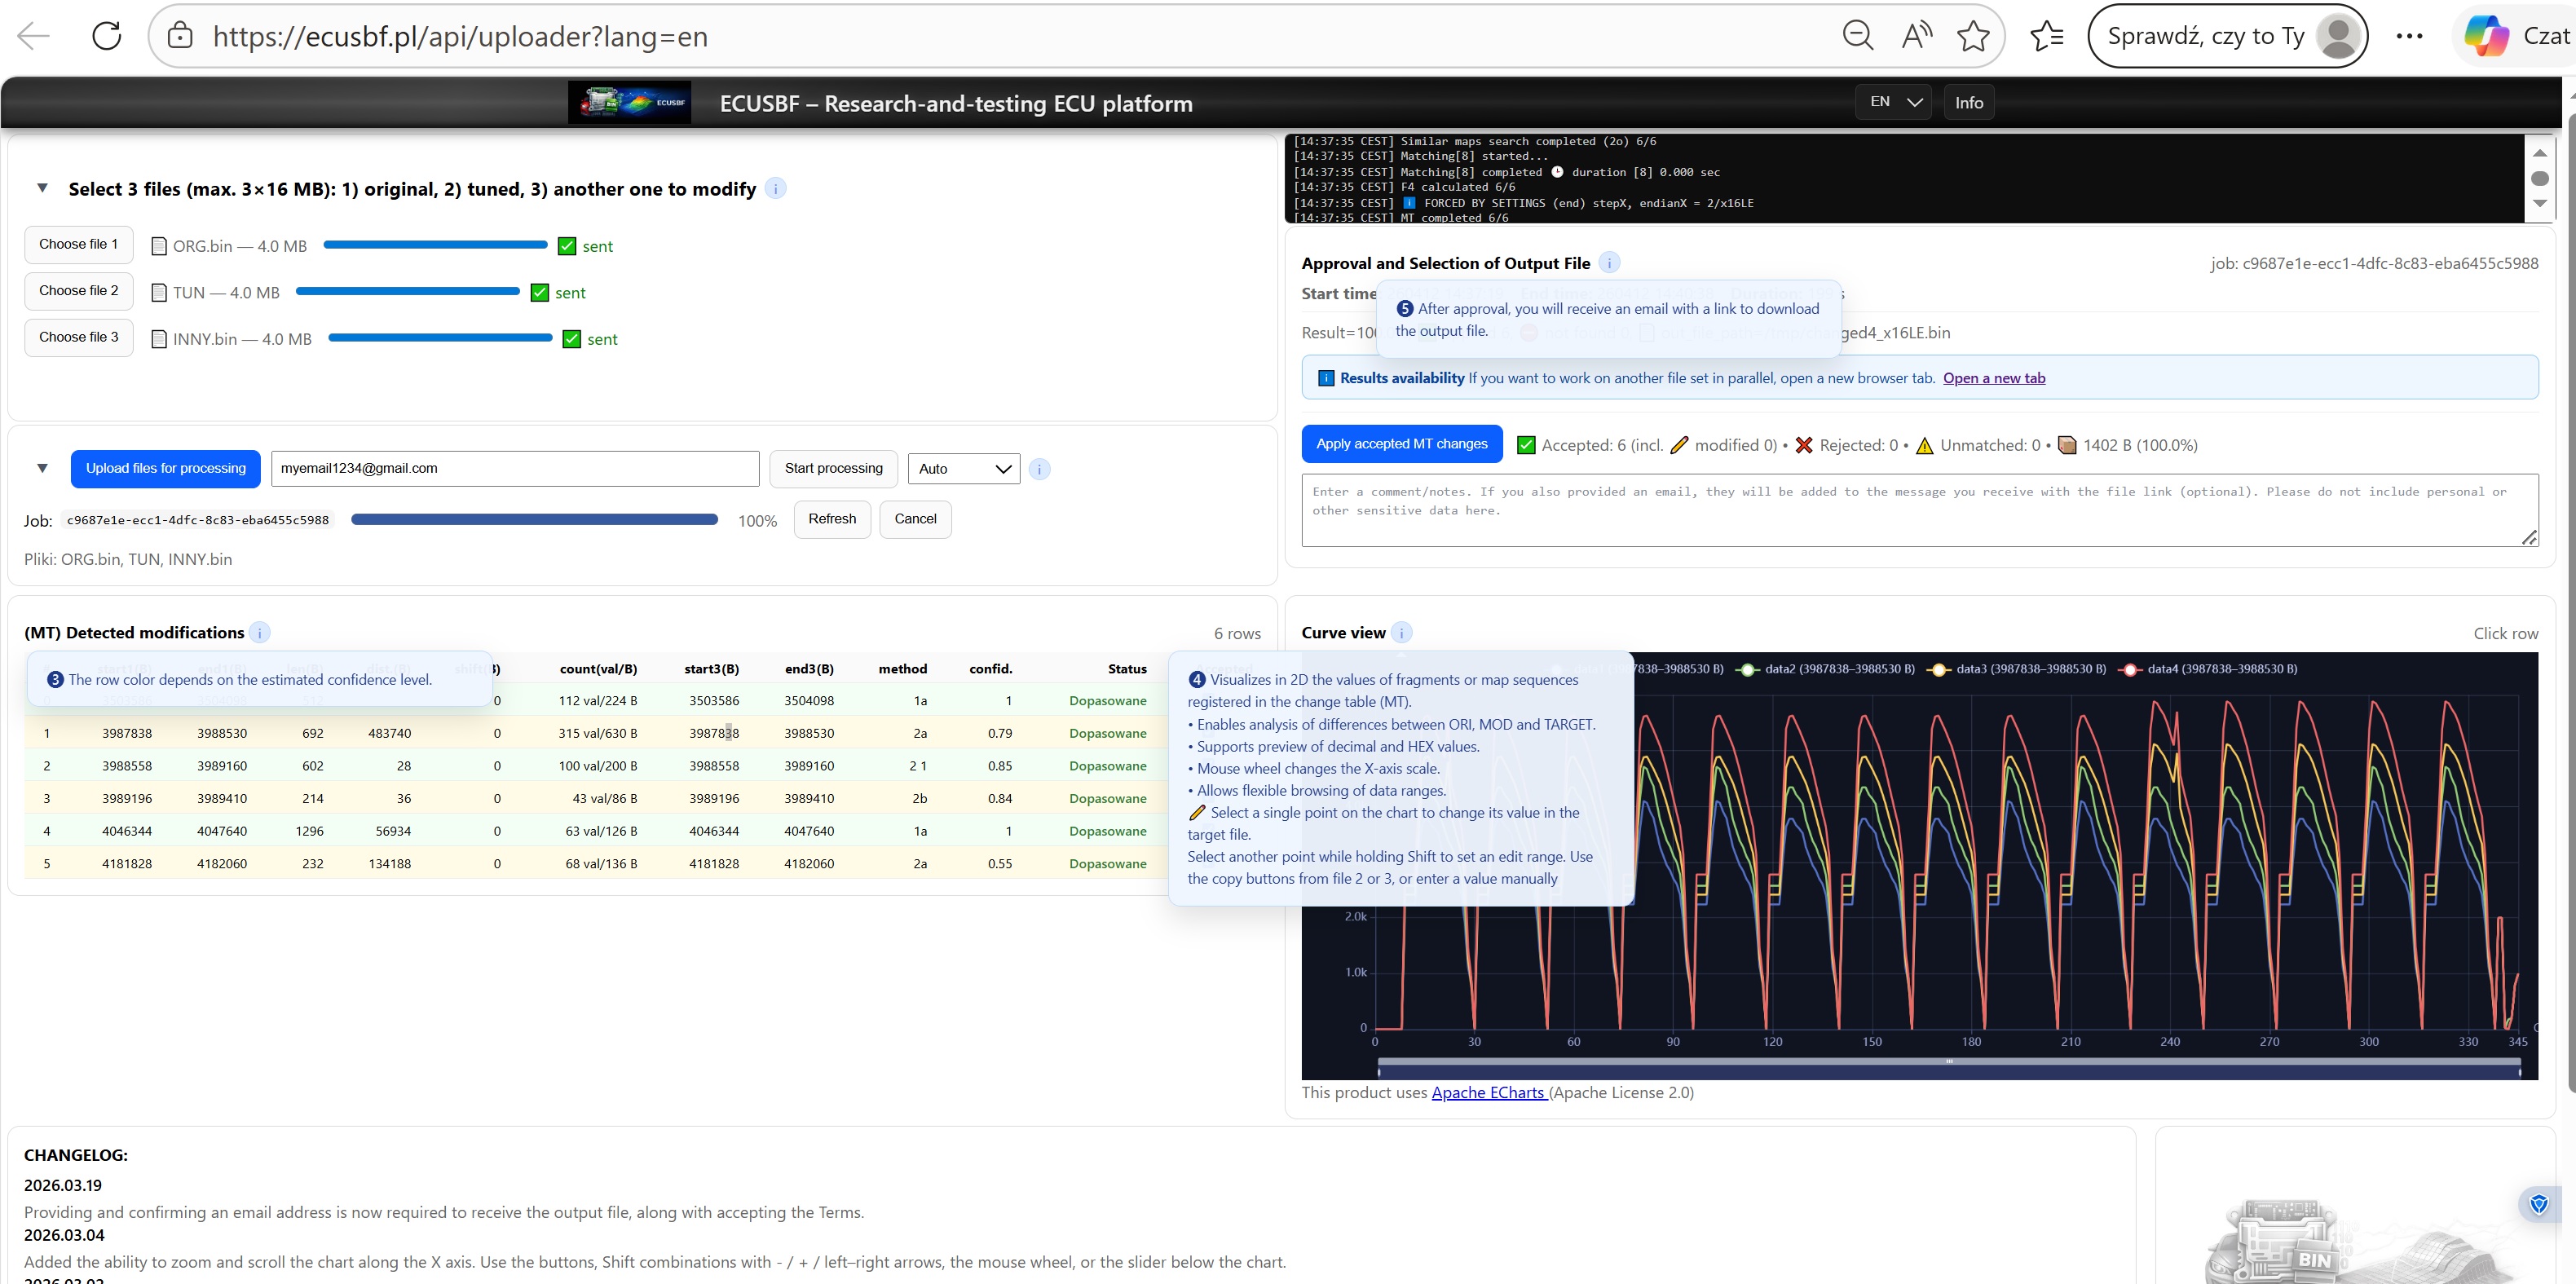
3–5MT table, chart view and approval
Once processing is complete, the MT table lists detected modifications. Row color reflects the estimated confidence level, while each record exposes offsets, lengths, matching methods and status.
Next to the table, the 2D chart view helps compare ORI, MOD and TARGET data. At this stage you can review records and decide which ones should remain accepted before moving on to the experimental output step.
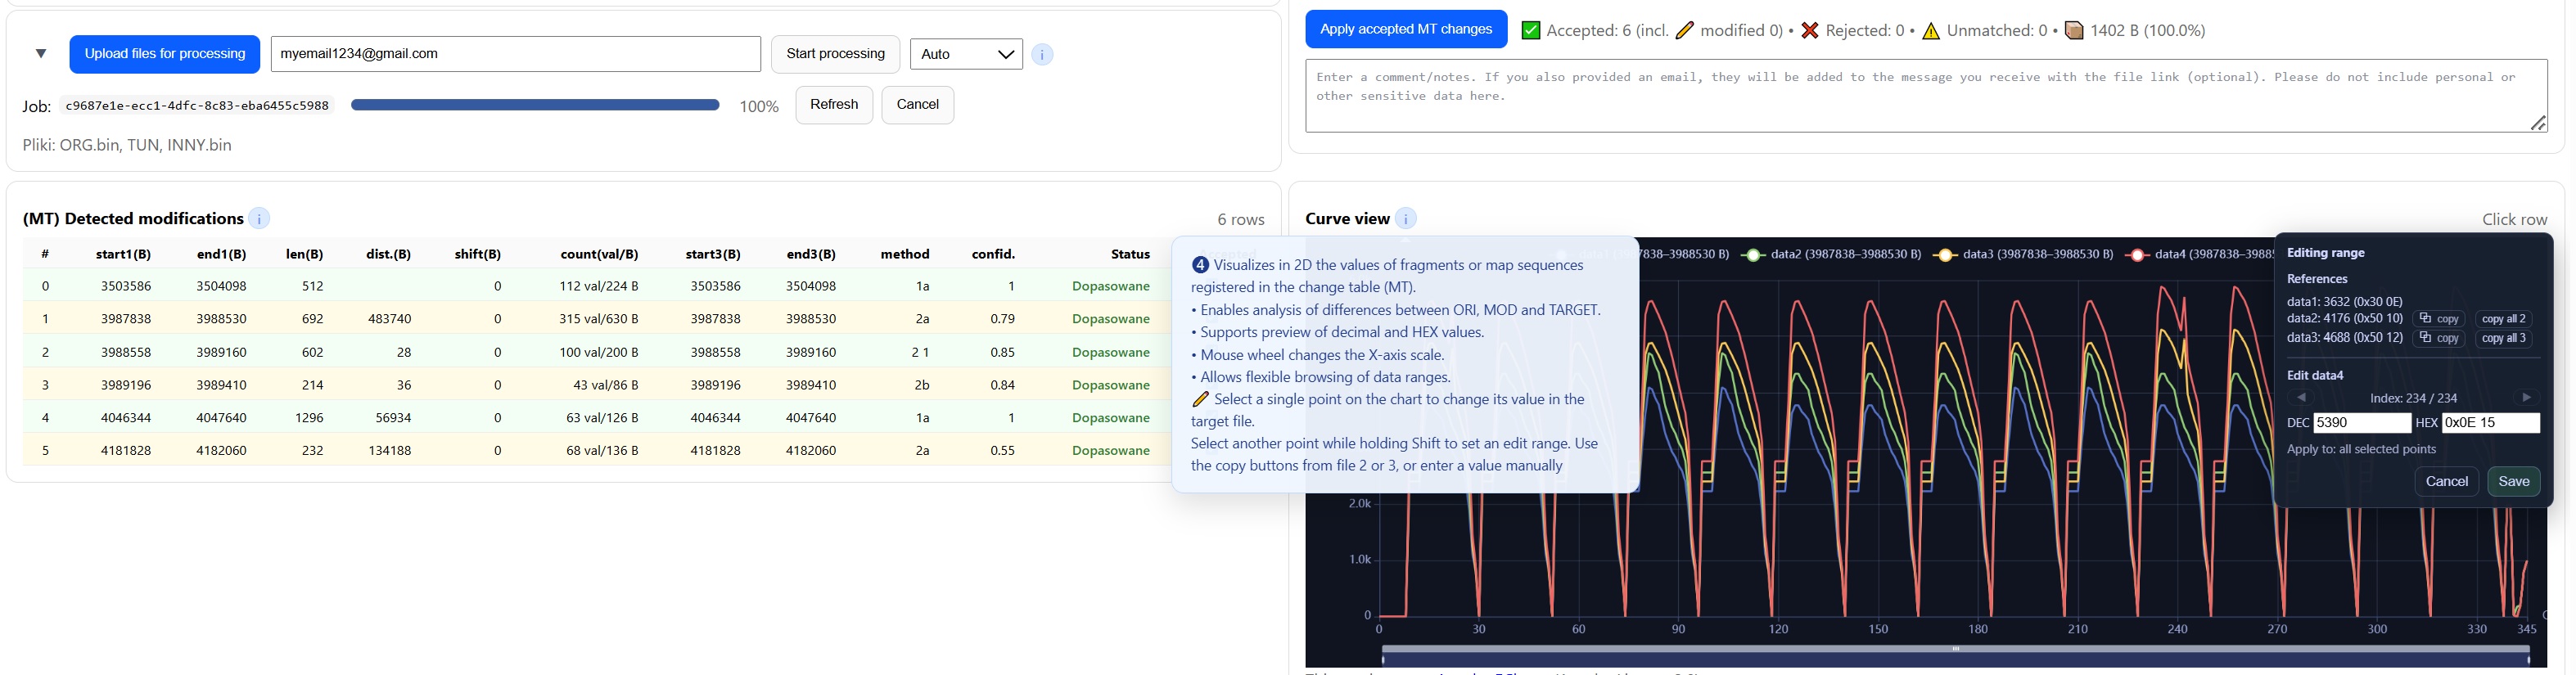
4Editing points on existing curves
The workflow also includes controlled point editing directly on the chart. You can select a single point, inspect reference values from other files and set a new value in either DEC or HEX form.
The editing panel also supports range selection with Shift, copying values from file 2 or file 3, or entering a value manually. This is useful when you want to keep the broader MT record but fine-tune a specific part of the target data.
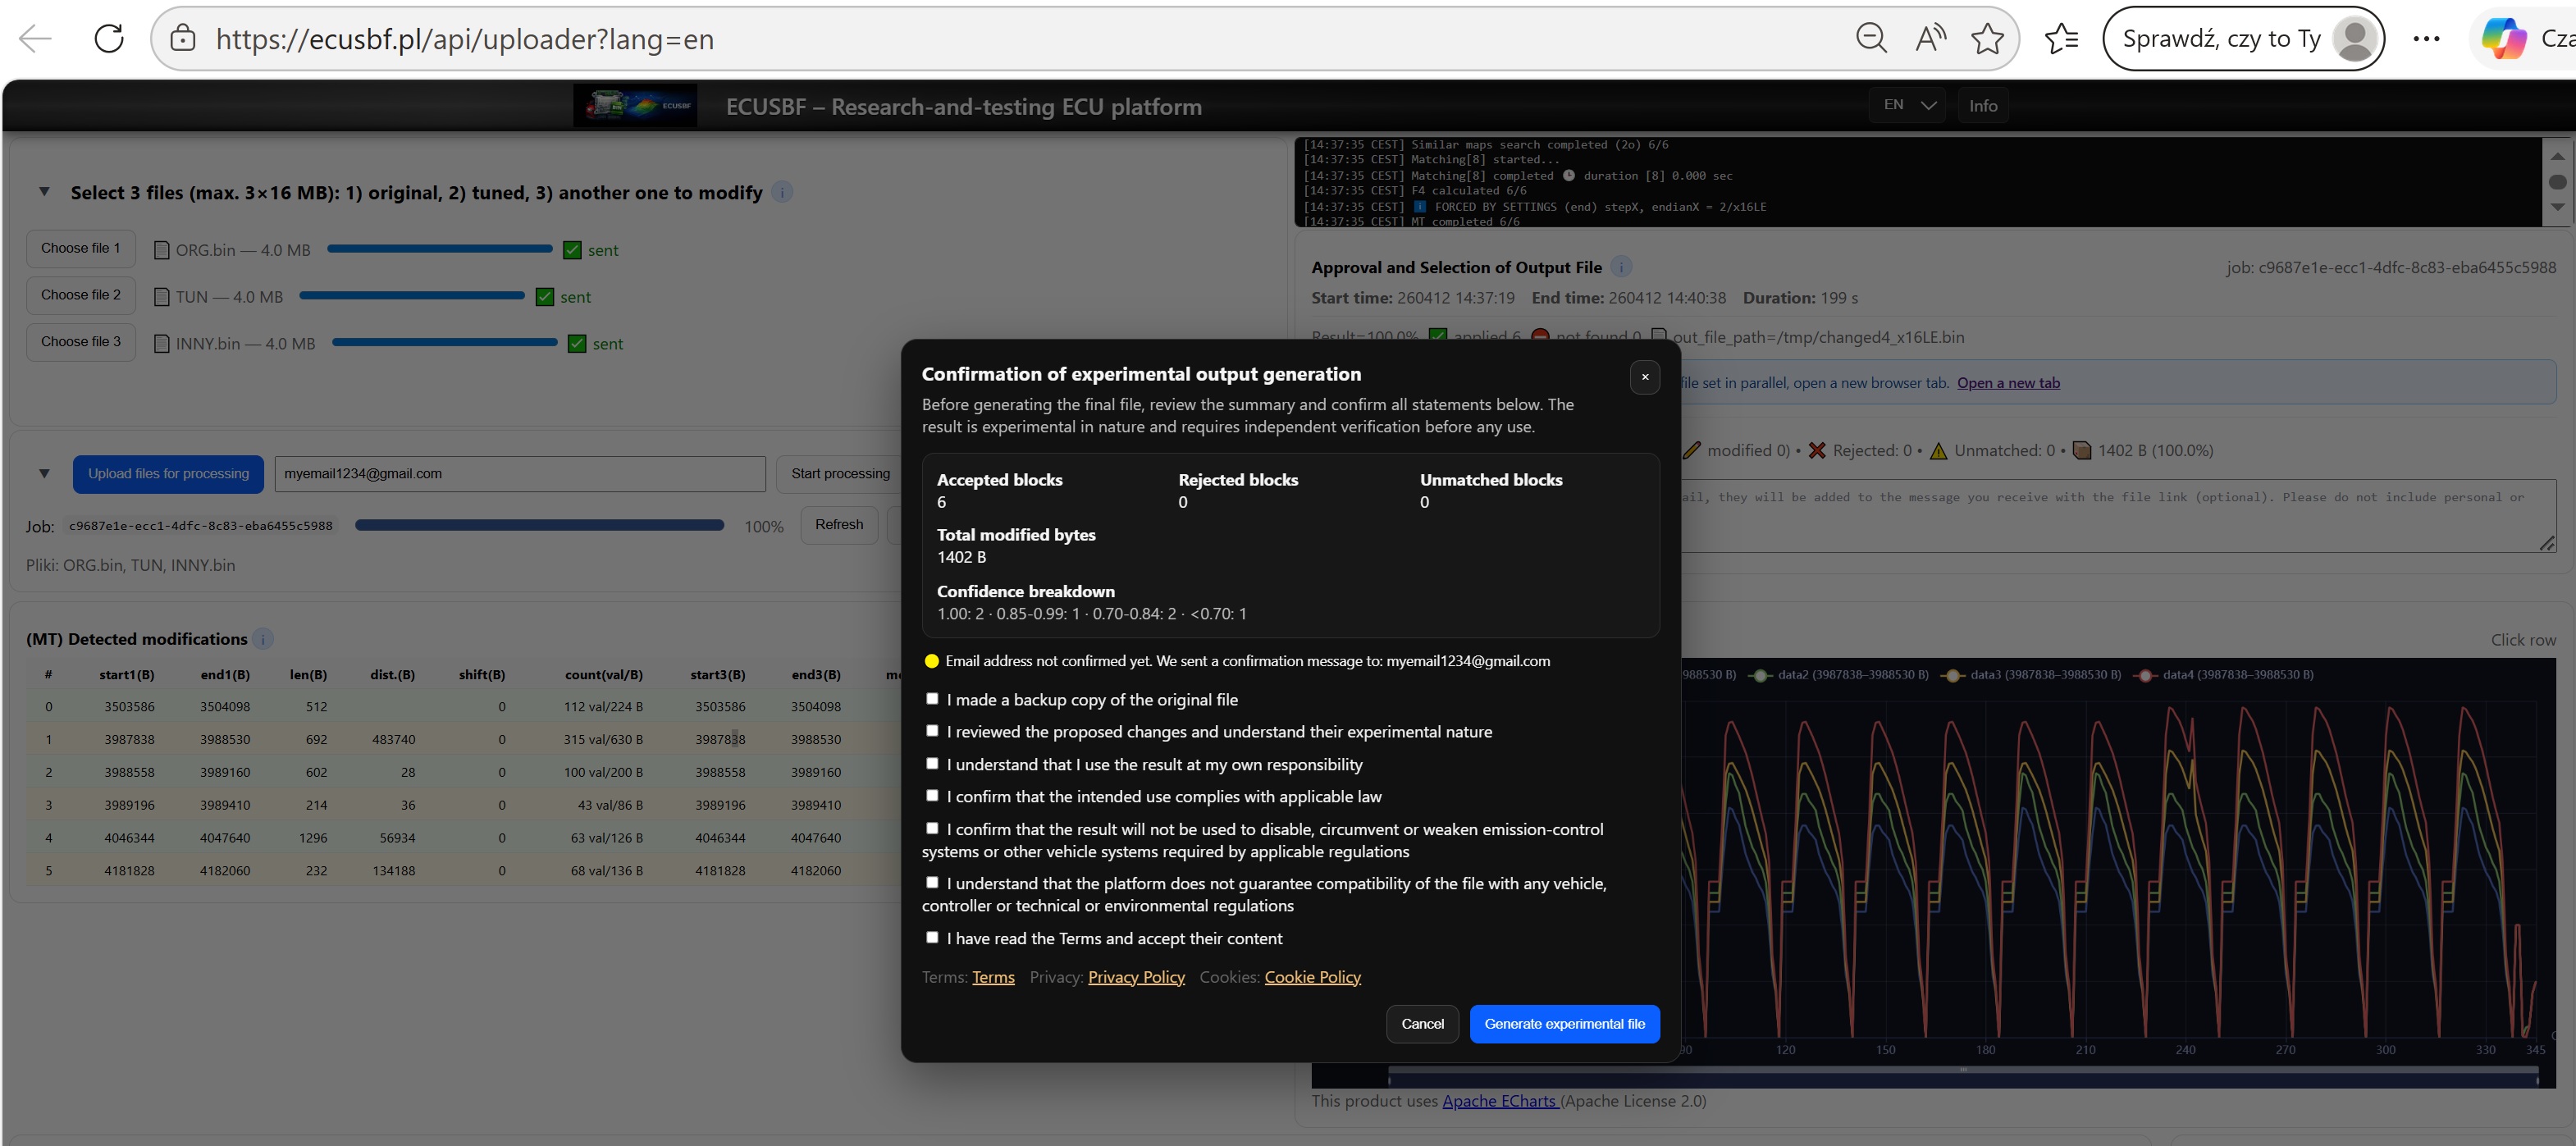
FinalFinal confirmation and experimental output generation
The final step is a confirmation popup. It summarizes accepted, rejected and unmatched blocks, the total number of modified bytes and the confidence distribution.
Only after confirming the required statements can the experimental output file be generated. This is an important compliance step: the user confirms backup creation, independent review, lawful intended use and acceptance of the Terms.